Home
| Photo
Index | Journal
Home
| Photo
Index | Journal
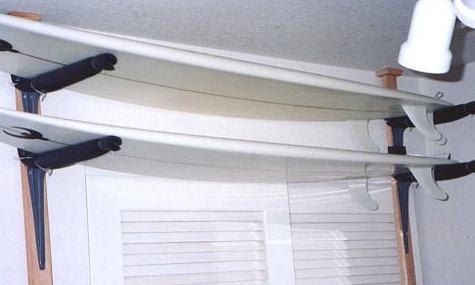
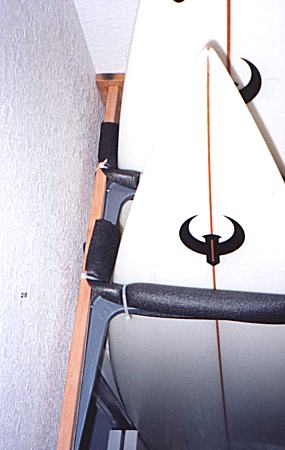
The idea here is a general guideline. I pictured the concept in my
mind and threw it together; I even eyeballed many of the screw placements
& it still turned out pretty good. If you decide to do something like
this you'll probably figure out the details yourself. The pictures are
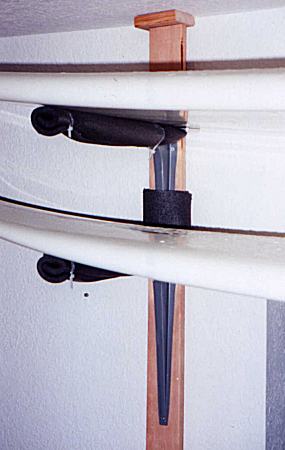
pretty explanatory I think; The key is the hanger bolt
& tension nut at the bottom of the uprights. If you use real thin
pieces for the uprights as I did, be sure to drill pilot holes for the
hanger bolts otherwise you'll probably crack/split it. The hanger bolt
& tension nut could be at the bottom or the top.
Lumber, shelf brackets, screws, bolts, pipe
insulation and cable ties. All from a single trip to the hardware
store and all for less than $25.00. Power drill, hand saw (all straight
cuts!) about 1.5 hours, a few beers and you're done.
 |
 |
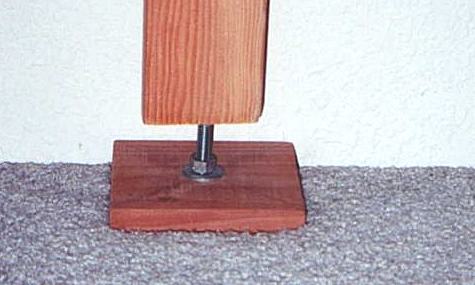
A hanger bolt is a bolt that is threaded as a wood screw on one end and like a regular bolt/nut on the other. The wood screw end goes into the upright. In the center of the bottom block, drill a hole a bit wider than the exposed end of the hanger bolt and about 2/3's of the way through. This hole will act as a sleeve to keep the bolt in place and let you adjust the nut down against the washer for the tension to hold the contraption to the ceiling.
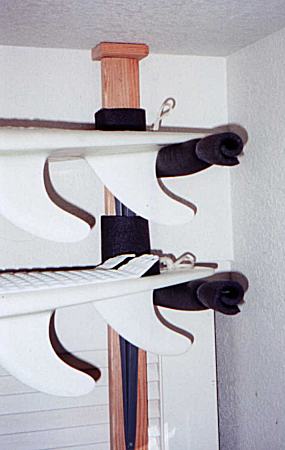
The measurement for the length of the uprights, in relation to the thickness of the top & bottom blocks, the tension bolt and the distance from the floor to ceiling, must be precise. You must allow for some "play" to adjust for tension. Take into consideration the thickness of the carpet too. One more view here.
Won't spend the time to get into minute detail here, but I'll answer questions as best I can
Good Luck. . . Let me know if it worked for you. . .